Stitch Patterns Editor
You can open the editor:
- From the main website menu
- From the website footer menu
- By pressing on the name of a saved stitch pattern in “My Stitch Patterns” or its photo (place for a photo). Then, use the “Change this stitch pattern in the editor” button.
- From the “Stitch Pattern Library” if you want to use a stitch pattern after editing it.
You can create stitch pattern charts for knitting needles, crochet or jacquard (multicoloured stitch patterns). The full list of symbols for knitting needles is provided HERE, and for crochet click HERE. A color palette is provided to create multicoloured stitch patterns.
The editor offers two modes of operation:
- Creating charts for storing in your catalog (library) and their further use as required
- Applying charts directly to template elements and save them in particular projects
Let us consider each of the options for working with the editor.
Creating charts in order to store in your catalog (library), and their further use as required
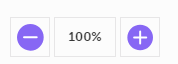
If you open the editor from the main website menu/ footer menu, you are offered to specify the size of the future stitch pattern in stitches and rows:
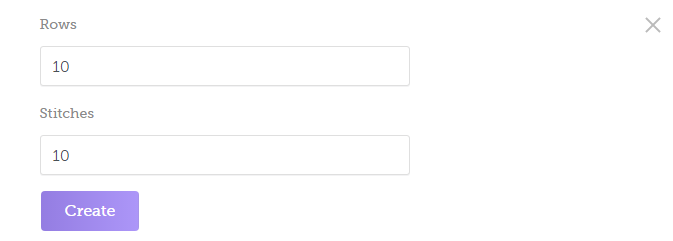
Set the required values and click on “Create”. Later, you will be able to modify the dimensions of the chart, if required.
Now, we are going to consider all toolbars of the editor and describe functions of all buttons moving successively from top to bottom and from left to right.
There is an edit panel located in the upper part of the editor.

Below is the description of its elements:
|
Element |
Name |
Application / How to use |
|---|---|---|
|
|
Back/ exit from editor button |
In the stitch pattern creation mode, you get to the previously opened website page; in the mode for application to the template, you get to the previous page of the project |
|
|
Create new stitch pattern |
A form is displayed to specify dimensions of the new stitch pattern (stitches/ rows), a new field appears for symbols to be applied |
|
|
Undo/ redo |
Standard buttons which allow returning a few steps back by canceling the changes made or return to the end state |
|
|
Copy |
Allows copying a chart area for its further use (copy/paste). In order to copy an area, first select the required place using the “Select” button |
|
|
Cut |
Allows cutting a stitch pattern fragment and then paste it to another place if required or just delete it. The cut area is in the clipboard until you copy anything else into it or until you exit from the editor. You can retrieve information from the clipboard by pressing “Paste”. Just like when copying, the cut area should be first specified using the “Select” button. |
|
|
Paste |
Storing information about a chart fragment that has been cut or copied. When this button is pressed, the saved area is visualized and you can paste it where you need by a left mouse button click. The fragment can be pasted multiple times. In order to cancel the button effect, select any other button in the toolbar on the left. |
|
|
Clear |
Clears the working field completely. If you have pressed the button accidentally, use the “Cancel” button. |
|
|
Save rapport |
Rapport is a repeated fragment of a stitch pattern. It is used when applying to templates. The button is inactive until you select a required area using the “Select” button. After an area has been selected, the button becomes active and you can save the rapport. If you have not previously saved the entire stitch pattern in “My Stitch Patterns”, you will be offered a special form. You will save the pattern and its rapport at the same time. If the stitch pattern has already been saved, the rapport will be saved and a “Saved” message will be displayed. |
|
|
Delete data |
Data of the selected is are deleted without saving in the clipboard. Select the area where symbols have to be deleted using the “Select” button |
|
|
Cancel |
Closes the editor and returns to the previous page opened. If there are any unsaved elements, you will be offered the option to save the stitch pattern or leave the editor page without saving. |
|
|
Save stitch pattern |
Saving the stitch pattern created to “My Stitch Patterns”. If no rapport has been created for the stitch pattern, you will have the option to create one. For more information about creating a rapport, see above |
|
|
Help |
Opening the help system |
|
|
Maximize window |
Maximizes the working area of the editor |
|
|
Stitch pattern size |
Enables you to see and, if required, modify the vertical and horizontal size of the stitch pattern (in cells) |
|
|
Display grid |
Displays/ hides the stitch pattern grid |
|
|
Fit to the window |
Places the stitch pattern chart so that it fits to the working area of the window completely |
|
|
Zoom |
Zooming in/out of the stitch pattern |


 . The selected area will be highlighted with green cells. Then, press “Copy” to copy the area.


 and then press the "Delete" button.


There is another toolbar located in the left of the screen:
|
Element |
Name |
Application/ How to use |
|---|---|---|
|
|
Select |
Selecting an area. The button is used before the following actions: “Copy”, “Cut”, “Flip horizontally”, “Flip vertically” |
|
|
Move |
Moves the working area of the editor if the entire viewing area does not fit to the screen. |
|
|
Calculator |
Shortcut to the calculator when some calculations are required |
|
|
Distance |
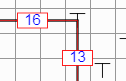
Shows the distance in stitches and rows between two selected cells of the editor. Selected cells are also included in the measured area |
|
|
Flip vertically |
Creates a turned mirror image of the selected area of the stitch pattern about Y axis. The copy is always located to the right of the selected area. Attention: if the area on the right does not have sufficient room for the full copy, only some cells will be filled with the stitch pattern |
|
|
Flip horizontally |
Creates a turned around mirror image of the selected area of the stitch pattern about X axis. The copy is always located below the selected area. Attention: if the area below does not have sufficient room for the copy, only some cells will be filled with the stitch pattern |
|
|
Stitch location |
Specifies the row number and the number in the row for the selected stitch |
|
|
Add symbols |
Places the selected symbol in the selected position on the chart. In order to select a symbol, use the special panel located at the bottom of the working window. The procedure of working with the panel is described below. |
|
|
Display rapport |
Displays an image with the rapport if it has been created for the stitch pattern |


Buttons of the left toolbar do not have any legend but are provided with pop-up tips.
Symbols are contained in the panel located at the bottom of the working window. Symbols are grouped according to the knitting technique: knitting needles, crochet and jacquard. By default, the panel is minimized so that only the main symbols can be seen:

In the right part of the panel, there is a button used to maximize the panel so that all symbols become visible:

The same button can be used to minimize the panel again. All symbols are provided with pop-up tips that are displayed when you hover over a particular symbol.
Applying Charts Directly to Template Elements and Saving Them in Particular Projects
When you work in this mode, the upper panel looks different:

This mode is accessible when working with a project where template elements have already been created and calculated. You can access it from the project window by pressing the “Add stitch pattern” or “Edit stitch pattern” button. For more information about working with projects, click HERE.
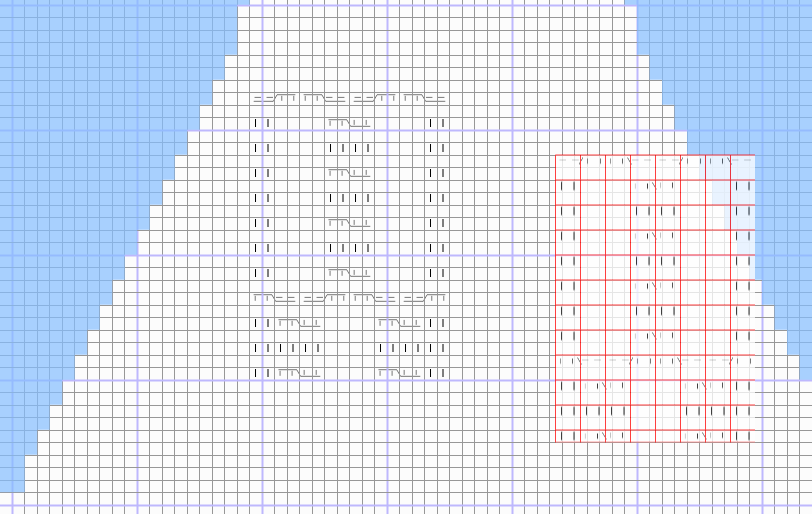
There is an additional tab “Add stitch pattern”. This contains a list with template elements appears next to the tab “Create stitch pattern”. When an element is selected, you can see the template represented in stitches and rows in the working window:
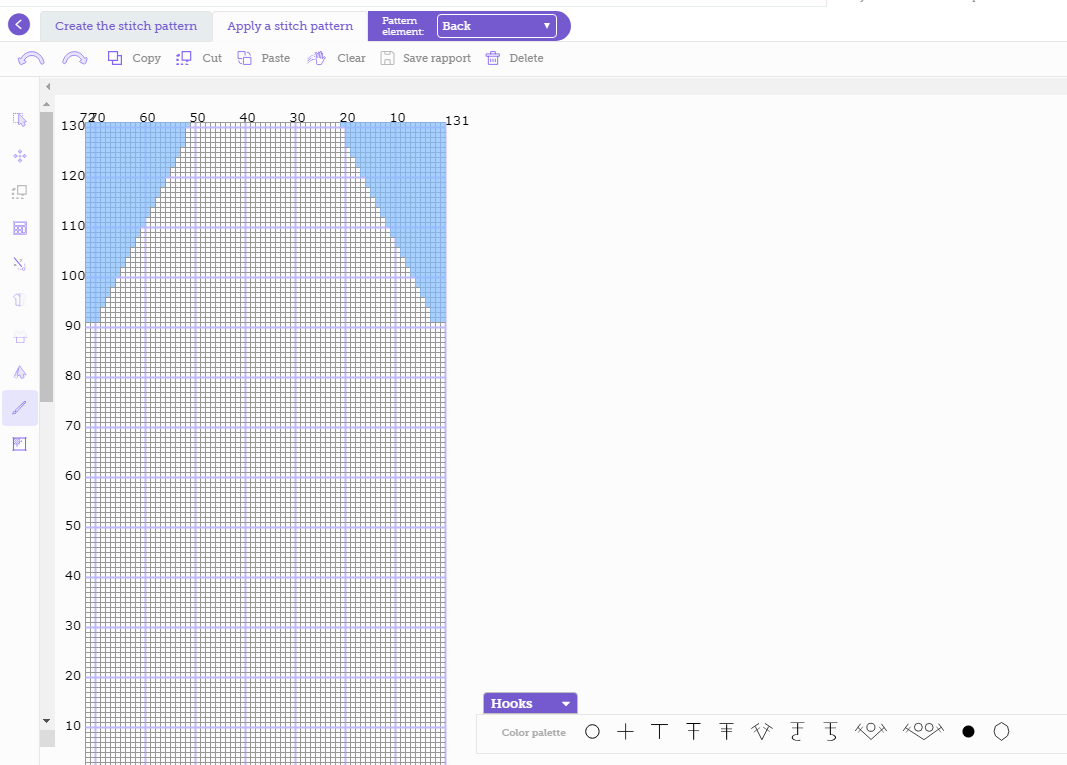
You can work here just like in the “Create stitch pattern” mode. Here the working area for stitch pattern application is the outline of the detail instead of a rectangular. The working area is highlighted with white color and the non-working area is blue. Symbols cannot be applied to the non-working area.
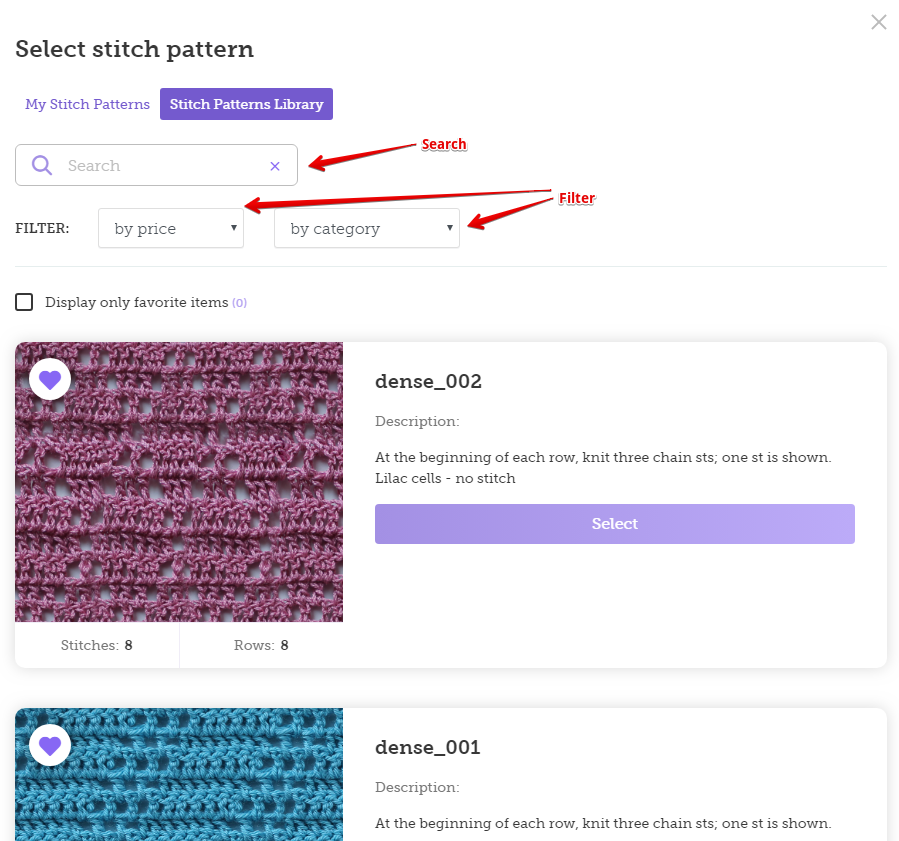
The upper panel contains an additional button – “Upload stitch pattern from the library”. Use the button to apply saved stitch patterns from the website library or from “My Stitches” to the template. When the button is pressed, you see a form with two tabs: “My Stitch Patterns” and “Stitch Patterns Library”. Each tab has a list of stitch patterns in the form of tiles with their images and descriptions. The form also contains a context search panel and a panel for filtering stitch patterns by categories (knitting needles/ crochet/ jacquard) and subcategories.
When selecting a particular stitch pattern, you will move back to the editor and see the stitch pattern rapport. Click the mouse to place the rapport in the pattern as you need. The rapport can be used multiple times. Press any button in the toolbar on the left or at the top to exit from the mode of rapport application to the pattern.
Toolbars contain the same buttons as those described above in the “Create stitch pattern” section, except an additional button – “Fill with stitch pattern”. It looks like  . If no stitch pattern is selected, the button is not active. After a stitch pattern has been selected, the button becomes active. When it is pressed, you will see the following panel:
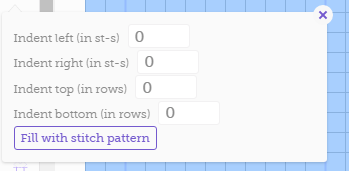
Use it to specify indents between rapports on four sides. If you do not fill the fields in, rapports will fill the template completely coming one after another. Filling with the rapport begins from the bottom left cell of the template and proceeds from left to right and upwards.
After the work is completed, press the “Save” button to save the stitch patterns. You can set a rapport when saving. Unlike working in the “Create stitch pattern” mode, this option is not compulsory. If you leave the page without saving, a warning window will appear where you can select whether to save the changes or leave the editor page without saving.