
General Rules
- Measurements for making a pattern of a jumper/cardigan should be taken over underwear. Put on the underwear you are going to wear with the garment. It is important because different shapes of bras, for example, can change the bust height and circumference.
- All measurements should be taken on the better developed side of the body. For right-handers, measurements are taken on the right side of the body while for left-handers they are taken on the left side.
- When measurements are taken, you should stand straight, without strain, in a posture which is habitual for your body. It is quite difficult to take measurements of yourself. When your body’s position changes, its dimensions change too. A possible way to do this is to take measurements of a garment which fits you very well.
- Mark the natural waist level with an elastic band or a thin cord to facilitate the task.
Main Body Measurements
- Neck circumference is measured at the base of the neck. Bring the tape together in the sternal notch.
- Shoulder length is the distance from the highest point of the shoulder line at the base of the neck to the end shoulder point.
- Bust height is the distance between the highest point of the shoulder-line to the most prominent point of the bust.
- Forearm circumference is measured around the widest part of the forearm.
- Bust center is measured between the prominent points of the bust. This measurement, just like the bust circumference, may vary depending on the shape and thickness of the bra you are wearing.
- Bust circumference: bring the tape around the trunk strictly horizontally, in the front – over the fullest part of your bust, in the back – keeping it horizontal. This measurement corresponds to the mass production size you wear.
- Sleeve/arm length is measured from the end shoulder point to the desired length. Your arm should be in its natural position, slightly bent at the elbow.
- Neck to waist (front) is measured from the highest point of the prospective shoulder-line at the base of your neck to the waist line in the front. The tape is applied vertically along the body. In order to find the highest point of the shoulder-line, wear a thin cotton knit tank top. The sought-for point will be located where the shoulder-line meets the neckline. It can be found before you start taking measurements and marked with a chalk. Then, the tank top can be taken off.
- Waist circumference is measured using the ancillary band located in the narrowest part of your trunk. Do not try to change your waist artificially by drawing the cord too tightly. You are beautiful, irrespective of the size while the correct figure will let the garment fit properly.
- Waist to knee (measurement for trousers) is measured when standing, from the waist line along the side seam to the middle of the knee-cap.
- Hip circumference: wrap the tape around your body horizontally, over the fullest part of your buttocks in the back, and with account for your belly in the front.
- Knee circumference is the measurement which is of special importance for narrow trousers. The tape is brought around the bent knee.
- Neck to waist (back) is measured from the highest point of the prospective shoulder-line at the base of your neck to the waist line along the back. The band is to be located vertically, tracing the curves of the body.
- Waist to hips (back) is measured along the back – it is the distance between the waist and hip lines.
- Wrist circumference is measured above your hand, over the prominent bones.
- Garment length: for a jumper/cardigan it is measured from the neck base to the desired length (along the back). For trousers/skirts it is measured from the waist line to the desired length along the side of the body.
- Neckline width: measure the segment between two points on the shoulders, corresponding to the desired neckline width. A band/double-band should not be deducted from the neckline width as it will be taken into account automatically when constructing the pattern.
- Neckline length: for a round neckline measure the length of the desired neckline, bring the measuring tape around the neck and shoulders along the desired circle (this measurement is to be bigger than the neck circumference). For non-round necklines measure the neckline depth from the neck base to the desired length.
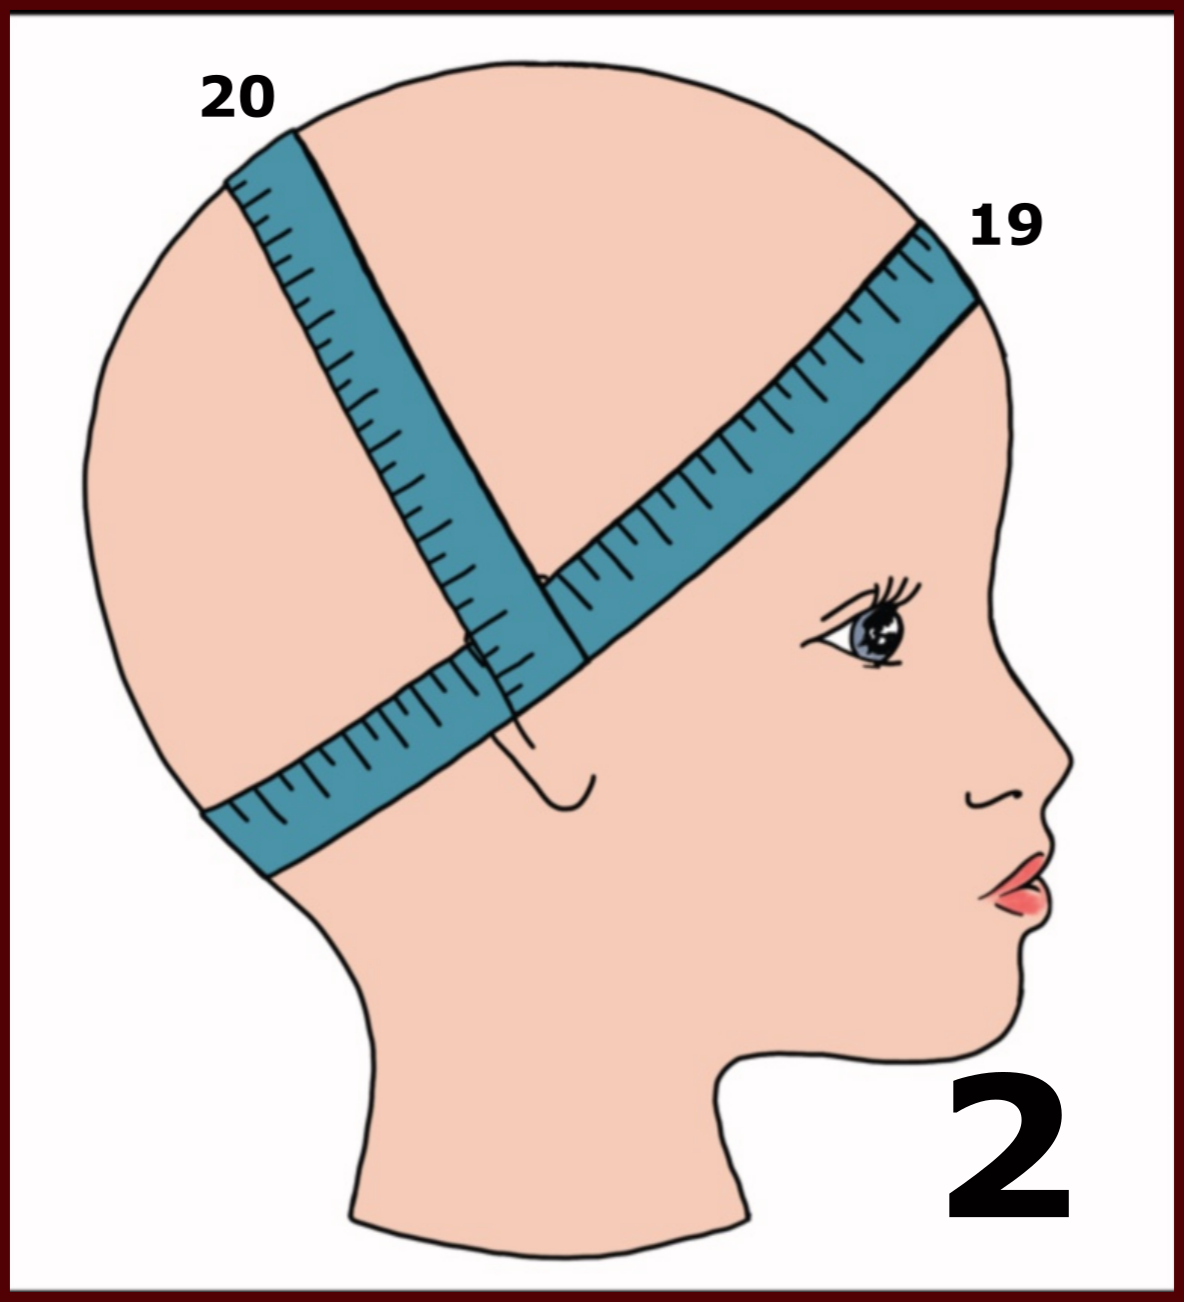
- Head circumference is measured as shown in fig. 2
- Hat height is measured from the ear lobe to the top of the head (see fig. 2)
Note
When making a pattern, it should be remembered that body measurements are not equal to sizes of pieces. When making drawings, an outsize value is added to the measurements for proper fit. The value is not constant.
When the "Basic Patterns Customizer" is used, you will be offered three options for the outsize: tight, medium or loose fit. Later, you can adjust the numeric value of the outsize. The pattern will be based on the fit you have selected.
If you construct a pattern yourself, you have to consider the outsize, either when making the pattern or initially, when taking measurements.